Showing posts with label DIY Party Decor. Show all posts

Monday, March 25, 2013

Camp Cash!

We survived birthday season!  

We just had my son's 6th birthday party....Camp Cash!  With the exception of the party favors (homemade tents), this party was extremely inexpensive and very easy to do!

Here's what we did... 


We had a Smore's bar! 


We had several types of chocolates, different flavors of marshmallows and two kinds of graham crackers!

Tuesday, February 26, 2013

Easy Bear Cake

 My son just had a camping themed birthday party and I wanted to make a special cake for him.  After searching the internet and Pinterest we decided that a bear cake would be perfect!  Even though this cake looks difficult, it's one of the easiest I've ever done!  You can totally do it too!


I came across an adorable polar bear cake here.  I loved it and decided it would be the cake to use as inspiration for my son's.

Here's what I did...

Friday, February 8, 2013

Angry Birds Party

Here is my Little One's Angry Birds party!


I'm not that great at printables and I don't have the money to buy them so I do my best.  These were made in my word program.  I just made text boxes and filled them in with different patterns and free clipart.  


Thank goodness for these FREE PRINTABLES !   

Monday, January 7, 2013

DIY ~ Pin the Beak on the Angry Bird


My Little One is having a little Angry Bird party in a couple of weeks.  I don't want to spend a lot of money but I still want to make it cute.  This is a "Pin the Beak on Red Bird" game that I made for a whopping $1.50!


Here's what I did...
I purchased a red and a yellow poster board at the dollar store.  They were only 50-70 cents each.  Then I Google imaged a picture of Red Bird to copy.  I sketched Red Bird on the red poster board.  Then I took some craft paints I had at home.  If you don't have craft paint, you can get some as cheap as 75 cents at Michaels or JoAnn's.  I painted his tummy, eyes, beak and eyebrows using white, yellow, and black paint.  I made the dark red spots with red paint and a touch of black paint.  You can also just buy the color red you want but I'm cheap and I really didn't want to go to the store.  I just made due with what I had to work with.  Next I outlined the entire bird, as well as, his eyes and beak in black paint.  Then I cut him out. 
For the beaks I used regular computer paper to trace the beak on red bird and then I cut it out.  I used the cut out on the yellow poster board to trace as many beaks as I would need (one for each kiddo).  I used the black paint to outline the beaks and then cut each one out.  
I plan to stick a piece of double sided tape on the back of each beak when the kids play the game.  This big Red Bird will hang on the wall during the party pulling double duty....party game AND decor!  Woot!  Not bad for about $1.50 and about 45 minutes time to create.  
Let your imagination go wild too.  I'm sure you can do this with any party theme you choose.  Pick an easy to draw character and create a fun game for the kids.  Good luck and have fun creating!

Saturday, January 5, 2013

No Sew Angry Birds Masks

My Little One is turning 4 this month and he is obsessed with Angry Birds!  So naturally we are having an Angry Birds party to celebrate!  I always do homemade parties and they are always on a budget.  I made these adorable little masks yesterday!  I still have to add a piece of string to hold them on but I was so excited about them I wanted to get them posted.   Don't worry if you don't sew...all I used were scissors and glue!


Since my mom and I do sew, we had enough felt between the two of us that these were totally free to make!  But even if you don't have any felt at home, it's really cheap and you don't need very much.  


I pulled up Google images of each pig and bird I wanted to create.  Then I drew a picture of it on some paper.  I cut out the drawing and used it as my template to cut out the felt.

Tuesday, November 27, 2012

Holiday Pinterest Party!

 I'm sure you know by now that I am kind of in love with Pinterest!  I'm convinced it's one of the best things ever created!  Not only do I pin a ton of things....get this....I ACTUALLY do them!  Sure I pin things for my imaginary home that I will never be able to afford, awesome recipes I'm not qualified to make and my new exercise plan that will have me back to my pre-baby weight in just two weeks,  but I also pin things that I have every intention of doing.  And I do! 

I began pinning a bunch of adorable Christmas crafts and decided it would be fun to have some of my  Pinterest obsessed girlfriends come over and make them together.  I wanted to get us all in the holiday spirit so I got my mom on board and we planned a holiday Pinterest Party!

And here it is...


We asked each guest to bring an appetizer or dessert they saw on Pinterest.  I made cupcakes (using a baking technique I found on Pinterest) and I also made Potato Cheese Soup in the crock pot.  And yes, the recipe was from Pinterest.

Friday, November 9, 2012

Art & Owls Party...Part 2


So the first Art & Owls post showed the set up.  Now here are some action shots from the party!


When the guests arrived they headed to the backyard where they colored a mural.

Thursday, September 13, 2012

Artsy Owl Printables

My daughter's "Art & Owls" party is coming up next month.  As you know by now I try to make as many party elements as possible and I try to be as cheap as possible too.  I attempted to make all of the printables for the party this time.  I know they are nowhere near as good as something you can order online but I wanted to try for myself.  I don't have a fancy program or even know how to use one.  I used my regular word program and created text boxes that I was able to "fill in" with patterns and outlines as well.  I found the free owl clip art by searching around on Google.  Here are some of the things I came up with...Amateur yes....but my daughter likes them a lot, so I'm ok with it.


This is what I came up with for the invites.  My daughter Keely was the one who picked the colors as well as the designs for the backgrounds.  All of the fonts were downloaded for FREE through links I found on Pinterest.  I used these colors, backgrounds, and the owl clip art throughout all of the printables.  

Thursday, August 23, 2012

Guess WHO is planning a party!

Birthday season is fast approaching!  Yes, I said birthday season!  All three of my kids' birthdays are coming up (not to mention Christmas).  I am officially in party planning mode.  I always start early and I try to make as much as possible at home as well as spend as little money as possible.
  
My daughter has decided she wants to combine her two favorite things together for her theme....Art and Owls.  She has been obsessed with owls since she was a baby and this will actually be her second birthday party with an owl theme.  She also is quite a little artist.  We are going to fuse the two together to create a party that screams Keely!  


I'm still in the beginning stages but thanks to pinterest, I have already found a ton of cute ideas to incorporate.  These little owl bags are going to hold the party favors.  They were completely made with materials I already had around the house and only took a few minutes to make.  My daughter even helped me, which makes it really fun for both of us.  

Tuesday, July 24, 2012

Pirate Posters!

Arrr Matey!


In my last post I showed wanted posters that I made for my son's second birthday.  They were so popular with the kids I decided to make a different version of them for my son's pirate party a couple years later.   I used the same technique as in my last post but this time I added a couple extra steps to make them even more "real" looking.

Monday, July 23, 2012

Wanted...


When my son Cash turned 2, he had a cowboy themed birthday party.  I like to find ways for the decorations & favors to be personal for our guests so I decided to make wanted posters for everybody.  They were a hit.  Every kiddo and grown up had wanted posters that were personalized just for them.  It was so fun choosing what their crimes and cowboy names were!  And it made a great party favor too!


I started with tan colored card stock and my word program.  I made a template to start with so I only had to change a few things as I did each poster.  I used a black and white photo of each person on their poster too.  I was able to find a photo of every person saved on my computer but you can also have friends text you photos of their kids if you are missing any. 

Monday, March 5, 2012

Star Wars Training Academy

Well we survived birthday season!  Cash loved his party and I finally have the chance to post the photos.  Check it out...


 www.etsy.com/shop/APartyStudio
If you need printables you definitely need to check out A Party Studio.   She has amazing products and the best customer service ever!


Light Saber Pretzels
(Please ignore my ugly food labels.  I misplaced my cute custom printables the night before the party so I had to scramble to get these done at the last minute.  The others were way cuter, but these did the job.)

Thursday, February 16, 2012

Star Wars Cake

As you know my son is having a Star Wars party (...in just 2 days)!  He requested an R2D2 cake, so this is my attempt at it.  This cake was not difficult to make but it was REALLY time consuming.  I broke it up into a couple of days; one for baking, one for assembling, and one for the details.  If I did it again, I'd make two attempts at the details.  My hand was really sore after all of the piping.  


So here's what I did...I made one cake in a glass bowl for the top of his head.   I also made 4 eight inch round cakes.  I stacked the rounds with frosting in between the layers and I added several dowels for support.  Then I placed the head on top.  I did a quick crumb coat and put it back in the fridge.  After about twenty minutes I put a smooth layer of white icing all around the cake.  I did this before I added the legs so I could get it as smooth as possible.  


Next I used store bought Rice Crispy Treats for the legs.  I used 2 on each side for the height.  I rounded the tops and then added little triangles to the bottom to give his legs the right shape.  I attached the legs with frosting and put a layer of frosting on the outside of them too.  Then I put R2 back in the refrigerator until the next day.

Thursday, February 9, 2012

Super G Officially Turned 3...Part 2!

Here are the photos from my little one's superhero party!


A quick shot before the guests arrived.


My three super kids.


All of the kids decorated their own masks and made superhero ID cards showing their chosen powers.


Cosmic Keely's finished mask.


Green Dragon Gage
After mask and ID card making we played a game of Duck, Duck, Goose...superhero style.  We called it "Superhero, Superhero, Villain".  


Next the kids completed a superhero training course.  They had to balance, crawl over and under saw horses, punch the punching bag, weave through the cones and crawl through a tunnel.  

Tuesday, February 7, 2012

Getting Ready for Jedi Training!

I am SO far behind. I haven't posted superhero party pictures yet because I am frantically trying to get everything for my other son's Star Wars party and I only have 11 days to finish!  Ahhh!  
Here's a sneaky peaky of what I've been working on.  There is still so much to do...


Light Sabers made from pool noodles.  Our little Padawans need their very own weapons if they are going to go up against The Dark Lord himself!


I was stressing over a "craft" for the kids to make so this is what I came up with.  I drew a quick picture of R2D2 and Yoda to use as a template.  I spent $5 on felt, then cut out all of the pieces.  The kids will glue them on a sparkly foam sheet and take them home.  

Tomorrow I'll be making 16 Jedi robes from pillow cases...wish me luck!

Tuesday, January 31, 2012

Super G is Officially 3! (Part 1)

We survived another birthday party!  Yay!  Super G officially turned 3 and he loved his little party.  I'm showing photos of the decor in this post and will show shots of the activities in another.  I tried to go as cheap as possible but still have it look nice.  Thankfully A Party Studio (www.etsy.com/shop/APartyStudio) made awesome printables for me which made everything look adorable!


We served appetizers and desserts.  The guest book was purchased on Amazon.com.  


We had lots of finger foods and candy.


And we served cotton candy from the dollar store.  Total cost $3 & I could have gotten away with only two packs.

Thursday, January 19, 2012

More Almost Free Decor!

I've been a little stumped on decor for this superhero party but my kids are totally excited about their "headlines" for the photo booth backdrop (see previous posts).  They keep asking me what their headline is and they're telling everybody how they "saved the day".  I decided to go ahead and print another copy of the same headline to hang up as decor for the party.  Here are examples of my own kids.  There are a total of 13 kiddos coming to the party so it didn't take too much time to make these.  I just used regular typing paper and a basic word program.  I think you could do some really cool things if you are good on the computer.  


Monday, January 16, 2012

Wear Your Decor!

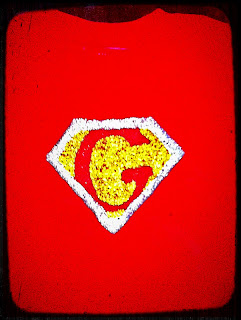
JoAnn's had t-shirts on sale, 3 for $10.  I had a 40% coupon and purchased a pack of glitter glue (red, gold, silver) for $6.  I drew a crest on paper for each of my kids and traced them on the shirts.  Then I filled in my tracing with the glitter glue.  So for $16 and about an hour of my time, my little superheroes have extra special shirts to wear to the party!  And they become part of the decor too! 
Not bad for about $5 a shirt!


Super Gage


Super Cash


Super Keely


Thursday, January 12, 2012

Photo Booth Backdrop

I'm planning to have a photo booth set up at Super G's party so the kids can pose in their capes and masks.  I wasn't sure what to use for a backdrop so I decided to get creative.  I used a leftover box from Christmas and opened it up.  Then I used Mod Podge and newspaper to cover the entire thing.  I also made "headlines" for each of the kids using their superhero names.  Hopefully it will make for some cute photos!


I'm not super in love with it, but it should do the trick.  It could have been better if I'd used a different color paper for the headlines.  The white really sticks out.  However, on a positive note, the whole project was basically free.  Maybe it can get your wheels turning for some other ways to set up your own photo booth backdrop!


Monday, January 9, 2012

Masked Crusaders


Here's another peek at one of the activities we have planned for the little one's party.  
Decorate your own superhero mask!  Less than a dollar per kid!  Not too bad!  


I found a template on line and used it for the shape.  I cut the masks out of foam and punched holes in the sides.  I tied on thin elastic and bought super cool stickers for the kids to decorate with.  
Can't wait to post photos later!