Sunday, December 18, 2011

All Abord...

My daughter's homework assignment was to make a Polar Express train car to be used in the school's annual Polar Express Ride.  I wanted my daughter to be the one supplying the ideas and doing as much of the work as she could.  When I was a teacher I always enjoyed seeing projects that the parents had a hand in but overall were made by the student.  I think we accomplished that.  I stuck on boxes and used the hot glue gun.  She handed me the pieces and helped me decide where we should place things.  I found a sample photo on line and we looked at it while we assembled her train.


This is the basic shape all hot glued and taped together.


I made the front of the train by taping two pieces of card stock together.  Then I rolled them up and taped them into a cylinder.  I clipped the end so I could attach it to the main box.  This wasn't something my daughter could do by herself.

Friday, December 2, 2011

Holiday Window Decor

In order for my oldest son to attend preschool, I volunteer my time at his school in exchange for tuition. One of the things I began in September is decorating the front windows for each season.  This could be an inexpensive and fun thing to do at home as well.  All you need is acrylic paint and a brush.  I even painted my back sliding door for my daughter's birthday party!  
For the winter scene I decided to do winter animals, Birch trees and snowflakes.  This can easily last through February.  Who knows, I may even add some hearts for Valentine's Day.  
I'm a planner so I first draw my idea out on a regular sheet of paper.  Then I lay butcher paper on my floor and draw out my design life sized.  I tape the butcher paper to the outside of the window and paint from the inside.  The hardest part for me is painting backwards!  Because you are layering the paint from front to back, you have to think and paint the opposite of how you normally would.  For example.  I actually started with the whites of the eyes, then after they dried I added the black for the eyes, as well as the nose and mouth.  Once that was dry I painted the rest of the face over the facial features.  I added the trees and snow last.  I probably should have done this over two days instead of one.  I ended up rushing the snow so I'm not completely happy with that part of it.  This was a big job but a simple design like snowflakes or a Christmas tree on your front window could be really cute.


Sunday, November 27, 2011

The Stockings Were Hung by the Chimney With Care...

One of my favorite things to do each year is make Christmas stockings.  I usually pick a family I love and make a set for them. Besides a Christmas gift, they are also a perfect gift for a new baby or even a wedding.  After all, they are something the family will keep for years to come.  And everybody loves to have something made (and personalized) just for them.  Depending on the type of fabric you choose, you can make a traditional stocking or you can pick a funky fabric to change it up.  Here are a few samples of the many stockings I've made over the years.


These stockings were made for one of my favorite families.  I made them all out of corduroy but in different colors (dark green & burgundy for the parents, red for their daughter, tan for one of their sons & blue for their other son).  The cuff, toe & heel are all made with the same fabric.  My favorite part is the lining.  I always choose a special lining that reminds me of the person...toy soldiers for  boys, pink & red snowmen for girls, etc.  I like how the cuff fabric is very traditional but the corduroy and the colors are nontraditional.


This is a close up of one of the stockings.  Each one gets a monogram to make it even more personal.


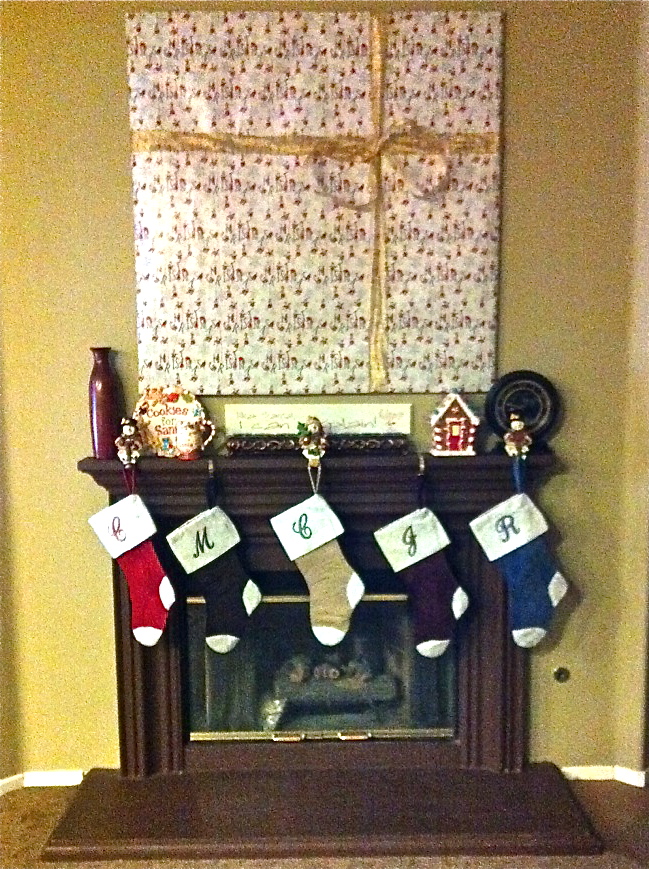
This is my mantel with our family stockings.  I made the stockings over several years, which means they don't match at all.  They are all different styles and fabrics but since they were made from the same pattern they all work together.

Monday, November 21, 2011

Pink Dinos

My daughter's friend wanted a pink dinosaur cake for her birthday.  I didn't have much time and I wasn't sure what to do.  I took inspiration from her party invitation and came up with this.  Thankfully the birthday girl liked it!


Sunday, November 13, 2011

Rainbow Cake How To...

Rainbow Cake How To...
My original plan was to have the inside of the cake rainbow colored and have it iced in all white.  That's really the only way I've seen it done, and as you know by now, almost all of my ideas are borrowed from somewhere and tweaked to fit my needs.  I was telling my mom my plan and she said she thought the cake would be prettier if I made the outside rainbow colored too.  I didn't want to hear it.  I didn't want to think about how I was going to do it.  And I really didn't want to make 6 different colors of frosting.  But I did...and I'm really happy about it.  It turned out prettier than plain white and everyone was still super surprised when we cut into it!
Here's how I did it.


I made 3 white cakes, splitting each in half to give me 6 layers.  Each half was tinted with Wilton gel food coloring and baked.  Then I froze them.  After the cakes were frozen I sliced about 1/3 off the top so that my cake wouldn't be too tall.  I put them in the freezer until I was ready to frost them another day. Next I put a white buttercream crumb coat on top and in between the layers.  And then I added several dowels to hold my cake together.


I mixed 6 colors of frosting and used disposable piping bags since there were so many colors.  I used Wilton tip 12.  It's just a big open circle.  I squeezed a dollop of frosting and then squished it and swept my tip through it.  I began with the purple and worked my way up the side of the cake.

Saturday, November 12, 2011

Rainbows and Unicorns Part 2


 The last post mainly showed the decor at my daughter's rainbow, unicorn party.  This post shows some candid shots from the party.


All of the kids were very busy crafting at the different stations.


The crayon melt required some adult supervision from Papa.


My little one loved using power tools with his Papa.

Thursday, November 10, 2011

Rainbows and Unicorns Part 1

We had the big Rainbow, Unicorn party for my daughter's 6th birthday.  It was a success!  It took a lot of prep and hard work but not a lot of money.  Everything was homemade and nothing was difficult to do.  Here are a ton of photos of the decor.  I'll post more showing the actual party in a separate post.


The main table filled with homemade appetizers and desserts.


Fruity Pebble Treats & layered Jello


Oranges filled with Jello & chocolate covered pretzels.


Otter Pop Slushies... the biggest hit of all.